Happy Monday, everyone! Thank you SO much for all the love and encouragement you shared regarding my new logo/blog/site launch last week. I was so overwhelmed with gratitude for everyone who took the time to take a look and send some support. I’m sending out big virtual hugs!
I used random.org to select a winner for the giveaway and CONGRATULATIONS goes out to Jennifer Anne Merrett of Stick Girl Jam. Woohoo! I will be emailing you to send you your prize. 🙂
Today I thought I’d kick off the week with something sweet. Something decadently, indulgently sweet. I mentioned in a recent post that one of my favorite activities of my weekend with the Kaisers was making homemade ice cream. There is nothing like a rich and creamy batch of fresh ice cream, is there?? I let Grace choose the flavor we made and she was quick to suggest caramel. That’s my kind of girl! This creamy and buttery ice cream is mind-blowing. When Nate took his first spoonful he said, “WHOA. This stuff is legit.” And I don’t know if I can put it much better than that. It rivals any premium ice cream I’ve had anywhere else, and trust me when I say I’m quite the ice cream connoisseur. I can’t take credit for the phenomenal outcome since I used a recipe from who else — David Lebovitz aka the King of Ice Cream. But, I can tell you that it is worth the time it takes to make homemade caramel as your silky base. Grace and I had a Monopoly game to get to so we skipped the caramel praline mix-in (little caramel chips). I’m sure they would add some scrumptious texture but you won’t miss a thing without them. If you try it out, let me know. I bet you’ll love it as much as we did.
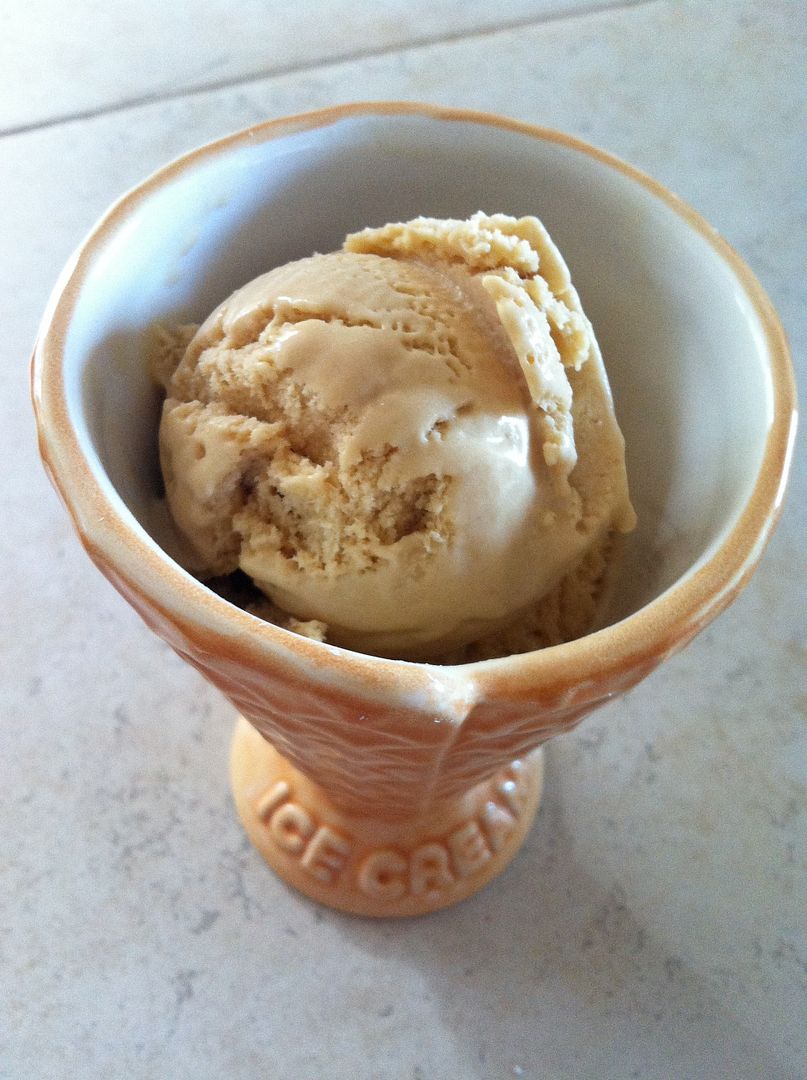
Salted Butter Caramel Ice Cream // makes a generous quart
**Adapted from David Lebovitz
- 2 cups of whole milk, divided
- 1.5 cups of sugar
- 4 TBS of good salted butter
- scant 1/2 tsp sea salt (the best salt you have in the pantry)
- 1 cup of heavy cream
- 5 large egg yolks
- 3/4 tsp pure vanilla extract
Prepare an ice bath by filling a large bowl with ice cubes (about halfway) and a bit of water so they are floating. Then placing a metal bowl on top of that so it is surrounded by the ice cubes. You want an extra cold bowl to add your ingredients later. *A key to successful ice cream making is having a completely cold custard (un-churned ice cream) before pouring into your machine.
Pour 1 cup of the milk into the metal bowl and put a mesh strainer on top of it. (You need a mesh strainer. Invest in one).
Spread the 1.5 cups of sugar in a large saucepan in an even layer. Cook over medium heat, stirring constantly with a heatproof utensil (such as a silicone spatula). Gently stir the liquefied sugar from the edges toward the center until it is completely dissolved.
Continue to stir and cook the caramel until it begins to start smoking and begins to smell like it’s just about to burn. (I know that sounds scary but it wasn’t that dramatic. I saw the tiniest wisp of smoke rise and noted the distinct caramel scent in the air.)
Immediately remove from heat and stir in the butter and salt, continuing to stir. Once the butter is melted, whisk in the cream.
At this point your caramel may harden (because you are adding cold/room temp ingredients to a hot melted caramel), but retirun it to low heat and continue to stir until it is amber liquid once again. Stir in the other 1 cup of milk.
Whisk your 5 yolks in a separate bowl and then “temper” the eggs. This means you very slowly and gradually add in some of the warm caramel to the yolks, stirring them, and then add a bit more, stirring… If you just added the eggs to the caramel right away, you’d end up with scrambled eggs (eww). The goal of tempering is to bring the eggs up to the same temperature as the caramel in a very gentle way. I add the warm caramel to the eggs a spoonful at a time, vigorously stirring the entire time. When the yolks are warmed up, you can add (slowly) to the caramel and continue to stir. You want to heat this mixture up until it reaches 170 deg F.
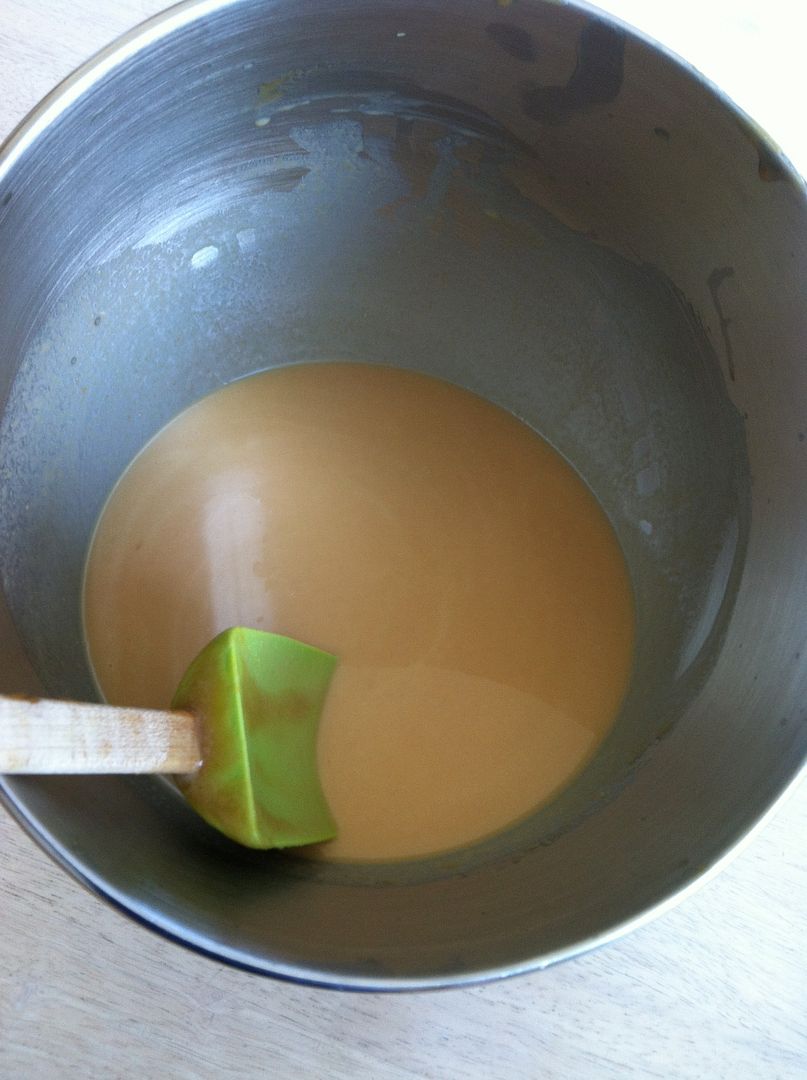
Pour the custard over the mesh strainer into the milk (in that metal bowl over the ice bath). This helps in case you didn’t temper patiently and have some floating egg bits in your custard! It also ensures that the final product is super silky smooth. Add the vanilla and stir over the ice bath until the mixture is cool. Then, put the custard into the fridge for at least 8 hours, or ideally overnight. This is a KEY step — your custard must be thoroughly and completely chilled. If not, it won’t freeze completely in the churner and you’ll end up with soupy ice cream. Delicious, but soupy.
When your custard is fully chilled, freeze it in the ice cream maker according to instructions. I use the Kitchen Aid ice cream maker attachment that works with my stand mixer. I love it!
Once the ice cream is churned, remove to a freezer safe container and chill until firm. (Fresh churned ice cream will have a softer texture since it doesn’t have any artificial stabilizers, but it will firm up nicely in the freezer.)
Enjoy!!
Have a sweet evening and chat again soon!

Argh, homemade ice cream, my weakness!! Although this looks like more prep work than I’m used to, but if you insist it’s worth it… I may have to try! 🙂
It is worth EVERY SINGLE MOMENT!! Promise! Try it and tell me how it turns out! xo